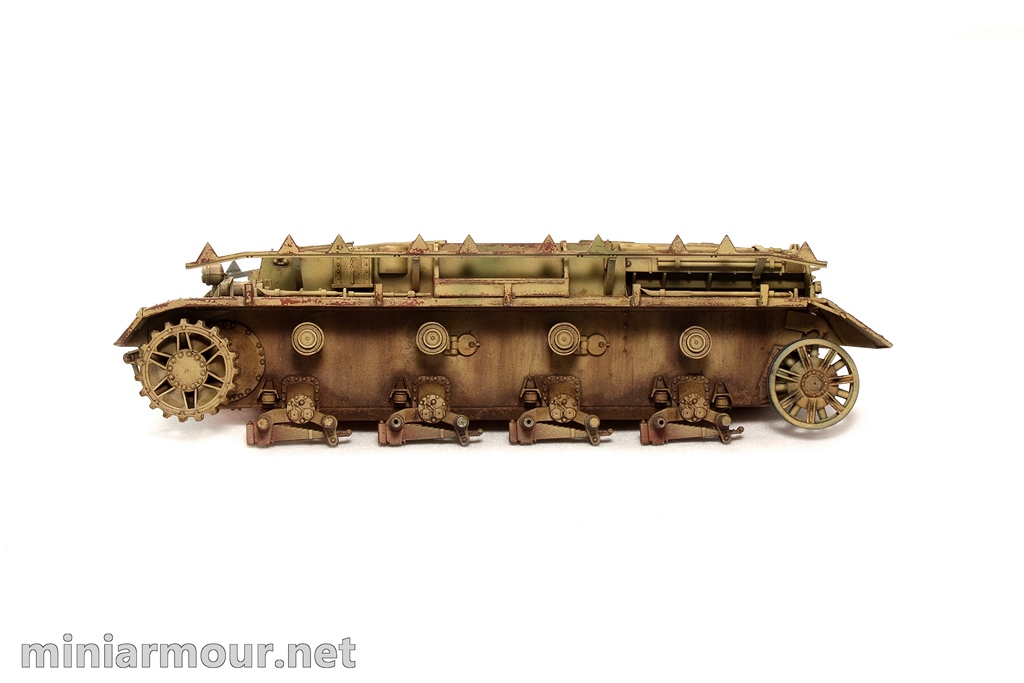
The next step was dealing with the lower hull, specifically weathering hull sides. Unlike Panthers & Tigers, where you can’t see anything from this part of the vehicle due to the size of the wheels, on Panzer IV this is one of the most visible sections of the tank (unless you are of course building tank with the side skirts).
With this build I wanted to try something new again and weather the sides of the hull more than I used with my previous models. I started with the AK’s wash that I have used before for the top of the vehicle, I just left more of the wash on the model to achieve darker effect. I followed with streaking using AK’s streaking grime for dark yellow vehicles and then airbrushed more of the wash along the bottom edge as well as right below the fender. I still felt this is not good enough as I was looking for stronger, darker effect and more contrast.
So I decided to give pigments a chance. I mixed two pigment mixes one darker and one lighter using 4 or 5 different pigments from Mig. I started with the darker one and applied it gently on the hull sides, which were in horizontal position (I have put the model on side) and then spread them downward using a brush, letting extra pigments fall off. Then I have dabbed more pigments along the bottom edge of the hull and under the fender again, to have them darker. I fixed the pigments in place using Tamiya’s acrylic thinner. This works very well, though it is different from oil/enamel-based pigment fixers. Acrylic thinner has lower viscosity, so it does not spread as easily by itself as oil based one, so I had to work with it bit more. Again, the method of application is one taken from Mike Rinaldi’s books (see TankArt part 1, the section on Tiger). I have applied it by combination of two methods – either airbrushing shots of thinner on the surface with pigment (this removes a lot of loose pigment though) or by using brush – soaking it with thinner and then gently touching the surface and letting the capillary action spread it, without disturbing the pigment placement.
The effect using acrylic thinner as pigment fixer is also different in the consistency of the pigment layer after having it fixed in place and dried – in my opinion acrylic thinner achieves more “muddy” looking effect as it clumps pigment particles more than enamel based one.
I repeated the above process with the lighter pigment mix, though I kept this one very limited, just to add more colour variety.
At the end I have added some splatters using AK’s earth and dust effects (AK 017 and 015), again in to steps – first with earth solution as darker and then mix of dust and earth as lighter mud on top. This as applied with a brush by bending the bristles again the stick I use to stir paints and then letting the solution splatter from very close to the surface.
At the end I was quite happy with the look, I may still touch it up later on to add some oil/fuel stains.
Categories: My models

2 replies »