
As the saying goes, there is no better motivation than a deadline. My modelling work sometimes feels as embodiment of this rule. Usually throughout the year I work on number of projects, but as the time of a model show approaches I always try to get some of them finished and present them.
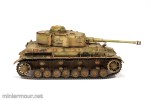
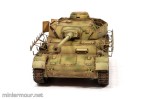
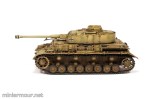
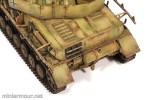
Recent HeritageCon was not an exception and one of the pieces I had on display was this Panzer IV. The story of this model started quite a few years ago and model was sitting on my shelf since mostly because I was not happy with some aspects of its weathering. There were some areas, where the weathering is as good as I can get these days (namely the lower chassis), but the upper hull had few places, where my experimentation with the hairspray chipping has not yielded desired results. As you can see from the previous blog posts, there were few large misplaced chips at places, where I would have hard time explaining their origin… Otherwise the dark yellow paint job had great depth and tonal variation. There was my conundrum.
The motivation to finish this piece came from a friend of mine, fellow modeller Dave Price (btw that great looking M13/40 you can see in my photo report from HeritageCon here, is his work), who mentioned on one occasion that he really liked this piece and would want to see it finished.
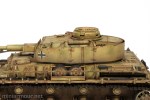
So, feeling that this battle might not be lost yet, I brought out the model and took the last few steps that were needed to get it done. First I had to paint all the tools and details on the fenders. This is usually tedious work as far as I can say, but I got it done without any problems. Then came the damage control. I have airbrushed lower edges of the add-on armour on the right side of the turret with AK earth wash to mask the weird looking chips. This has hidden them, but created quite a dark area along the lower edge of the plate, which was bit too excessive in contrast to the rest of the paint job around and this contrast was not reduced even with few layers of oils wash using Burnt Umber paint. So at the end I decided to go back to the base coat and gently covered the area with mix of Tamiya’s Desert Yellow and White acrylics that was as close to the original paint work as I could guess.
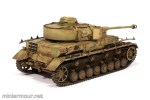
This worked quite well, though I had to be careful not to overspray the German kreuz marking, which I mostly avoided and whatever there is can be attributed to dust…
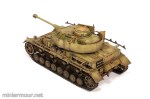
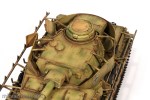
The last step was adding few touches with pigments, mostly in the corners on the top of the hull where the dust and dirt would get trapped.
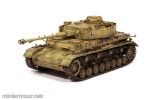
At the end I must say the model came out quite nice, given I had almost given hope on it. Surprisingly to me this piece took first place in the WWII Axis armour category at the HeritageCon. For all of you who also like this piece, make sure to check my build log here.
My thanks goes to Dave Price for not letting this project die…


Categories: My models

I can see you have the mounts for the side plates. Do you have the plates separate somewhere and can add them on if wanted or just elected not to use them?
Looks great, I like the faded camo rather than sharp lines.
Hi,
yes, I have the plates, I just decided not to use them. I felt that they hide too much of the details on the vehicle. Thanks, I’m glad you like it.
Cheers,
Vlad
Back Again Vlad, I have been trying to locate a definitive answer to what color pre WW2 and early WW2 British AFV’s were painted on the inside. I keep being told that its a flat aluminum sort of. Any advice would be greatly appreciated.
Not sure, would call myself and expert on this, but can ask someone who knows a lot on this topic. Will let you know.
So here is the response from a friend whom I would believe when it comes to British armor: Silver, during the war it was changed to white and later on back to silver.