
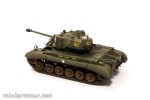
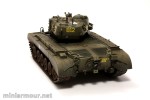
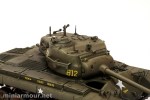
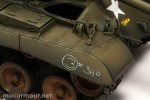
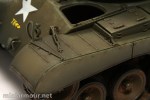
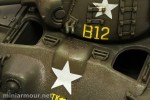
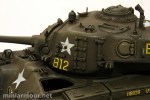
Few days ago the decals for the Pershing have arrived and I have spent past 3 evenings playing with them. It was a bit tricky, because the vehicles for which the specific marking options were provided in the set were in most cases a bit unique – either didn’t have the side skirts, or had tarp over the mantlet, etc. There was one marking option which I liked and which fitted my configuration, well, mostly… I have noticed (bit too late, should spend more time on planning next time) that I will have one problem. The actual vehicle had missing some details on the turret – e.g. spare track link holder on the left front side, some tool holder on the right and .50 cal mount on the turret roof. The vehicle had instead some of the markings at these places, so I had to figure out how to deal with this. At the end I had to cheat just a little bit, so that unless you are an expert on the Korean Pershing markings, I guess you wouldn’t know.
One particular tricky marking was the white star I had to apply over the track link mount. To do so, I cut a small rectangular hole in the decal in the place, where part of the track link holder protruded too much for the decal to set in. For the rest of the surface details I was relying on my trusted Micro Sol and Micro set decal solution, which did amazing job in the past (check out my Panther and the numerals on the left side of the turret, perfectly snug…). It worked, though not as well as it had in the past with the decals from the Dragon/Echelon, so I will need to touch it up a bit with some White/Ivory acrylic.
In few cases I have encountered heart-stopping situations, when the decal after the application of Micro Set wrinkled, but at the end the solution was just to wait for the Micro Set to dry. Afterwards decals set in without any issues.
Not to forget – before the application of decals I have applied the Tamiya X-22 Clear at the areas where the decals were to be applied to make sure the paint would not absorb any water or Micro Sol/Set solutions, creating ugly marks on the surface. I have applied another coat after the decals dried to protect from the weathering effects.
At this time there are 2 more step to be done with respect to the decals – they are bright and shiny and completely inconsistent with a vehicle in use. I will apply very (and really very) thin coat of the base colour over the decals to blend them with the surrounding area and make them bit more muted. I will also have to fix the gloss on the surface – this will be partly eliminated by the oil-based weathering steps which will follow, but can also be reduced by thin coat of flat coat, being carefull not to overdo it.
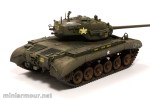
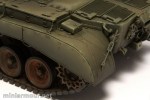
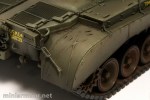
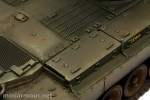
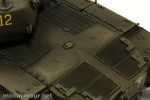
After the decals I have applied wash using this time AK’s Dark Brown Wash for green vehicles. I have found out that because it had lower viscosity than my oil-based wash, it did not flow so much over the surface of the model, but went right into where I wanted to have it.
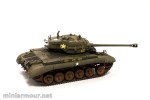
Afterwards I have applied highlights and first phase of chipping – chips in lighter color than the underlying paint. For this I have used mix of Winsor & Newton oil paints – Permanent Green Light as a base, Burnt Umber to make it more brownish in line with the underlying colour of the model and Naples Yellow to lighten it. The mix must have the right level of contrast with the paint underneath and should not be vibrant, otherwise it will look unnatural – the chips are supposed to replicate the older paint layer, which is to be less saturated and “bleached” by the elements to which the vehicle was exposed. I have applied the chipping using drybrushing and sponge techniques around the edges and corners. I have avoided areas which are painted in the darker tones – lower edge of the front glacis and lower edges of the side skirts, as the contrast here would be too high.
Next step will be the application of the dark chips.


Categories: My models

2 replies »