During one of my recent visits to my local hobby shop I have finally got one of their latest Trumpeter kits – BMP 1. Originally I was planning to wait for the version with other than Russian green markings, but as it was no coming I thought I would have a look at this one.
Based on what I have heard, this kit is quite popular, I guess first because it is Russian armour, which is always popular and second, because BMP1 had long and rich operational life, so offers vast array of versions and markings..
After I had brought the kit home, I looked into the box and at the instructions and figured out this could be rather straightforward project. I know I had tried the few times with other kits and sometimes the short simple project turns into a shelf queen, but I wanted to give it a try.
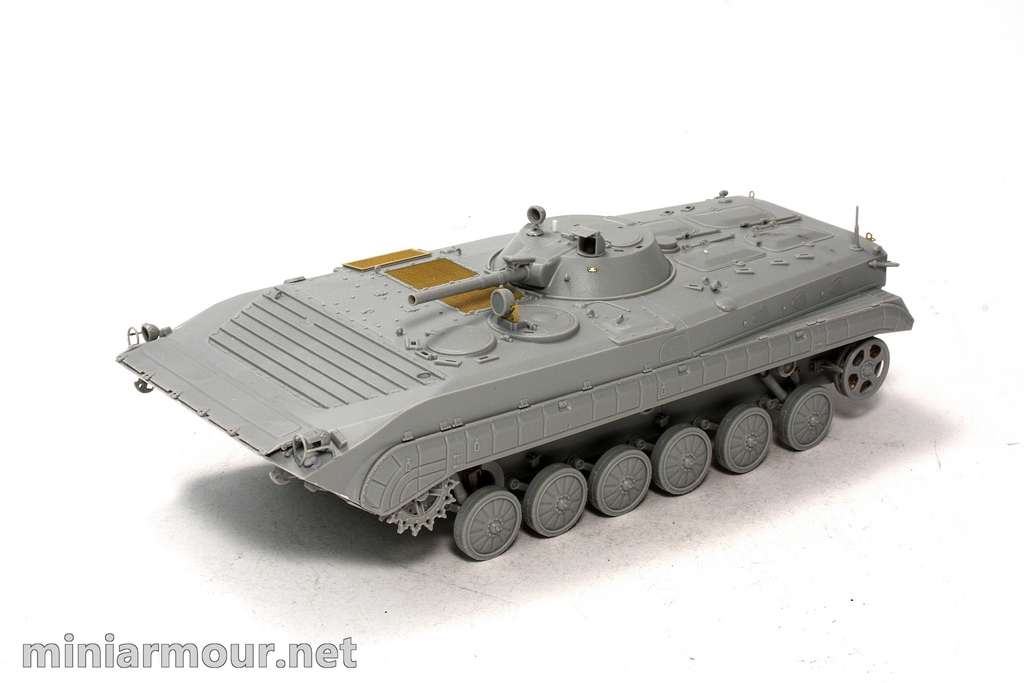
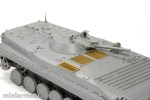
I was no disappointed, BMP1 was one of the most enjoyable builds I can remember. The kit goes together very well, fit of the parts is outstanding, Trumpeter is really making progress, it is almost incomparable to some of their (just a year or two) older kits. There were only few places that needed more attention..
The gap between the upper and lower hull needed some filler and fine sanding as it was quite prominent.
Many of the locating holes for fittings on the upper hull were slightly larger than they should be, so after placing the respective parts in them, the resulting small gaps had to be filled.
I recommend removing locating strips on the parts G33 and G32 – rear section of the mudguards, if you leave them on, these parts will be positioned bit too much to the rear, so there will be a gap between them and the mudguard section of the lower hull in front of them. Remove the locating strips and position the parts easily, so that they fit.
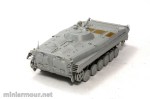
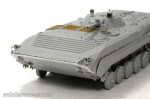
I had left out all the inner details of the rear access doors and crew hatches, these will be left closed as there is no interior provided in the kit.
Hinges of the rear access doors are not molded as perfectly as many other smaller details, I recommend to place the door parts G26 and G27 in their opening in the hull and then attach the hinges (parts G19, G20, G22, G23) to make sure they are correctly positioned.
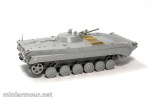
As I plan to build BMP into a late Mid-east version (more of this in the next post), I have also omitted the rocket launcher mounted above the barrel – I only used parts D2 and D4.
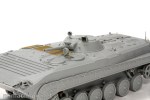
The kit offers two options for barrel – metal and plastic one. I have decided to use the plastic one for two reasons – the metal one represents only part of the barrel tube, it still requires to assemble part of the barrel from two plastic halves, unlike the plastic one which is nicely molded in one piece. The plastic barrel also has thinner barrel walls (apology, I guess this has some other correct technical name), so the look of it from the front is better in my opinion.
This kit also has the usual challenge associated with the vehicles with side skirts – usually you have to paint the area of hull sides and running gear first, only then to mount the skirts, then mask off the painted parts and continue the process with the hull. I have decided to get around this by gluing the side skirts (parts G1 and G50) only at the rear end up until about half-way through the length of the hull. This way, the rear is already attached, the front half is flexible enough so that you can bend it gently and insert the sprocket wheel once it is painted and position the tracks. In the meantime you can paint and weather the whole hull in one go. Once all the wheels are ready, hull sides are painted and weathered, you can attach the remaining part of the skirt into place.
At this time I have left off all the clear parts as I will be adding them during the painting – more on this later.
Tracks provided in the kits are very well done. You have to cut them from small sections of sprues and clean them, but this is going rather well at the moment. The tracks are workable, though rather fiddly, so will have to be careful when mounting them. But at least I don’t need to replace them with more expensive alternative as they look fine to me.
The kit includes also small photoetch sheet with engine grills and few other small parts, I am quite impressed with the level of detail that Trumpeter has achieved while keeping the parts breakdown very simple.
The construction of the kit (without the tracks) is quite fast, I had it done within evenings of one week. So now I am well into the painting phase… and having fun with it…


Categories: My models

1 reply »