
After many evenings of meditating about the composition and look of the base, I have finally decided to go for it. My vision of what I want to achieve wasn’t 100% there, but based on my previous experience sometimes it is best to just go for it and get inspired along the way. I will of course likely get some more ideas later on, but these can be used during any future projects.
I followed my usual process – I have covered the styrofoam with the plaster used to patch drywall and which can be bough in large volumes in Home depot. I covered the styrofoam up until the edge of the styrene walls – i.e. some 5-7 millimeters. Then I have brushed on white glue thinned with water and started placing all the terrain elements on top:
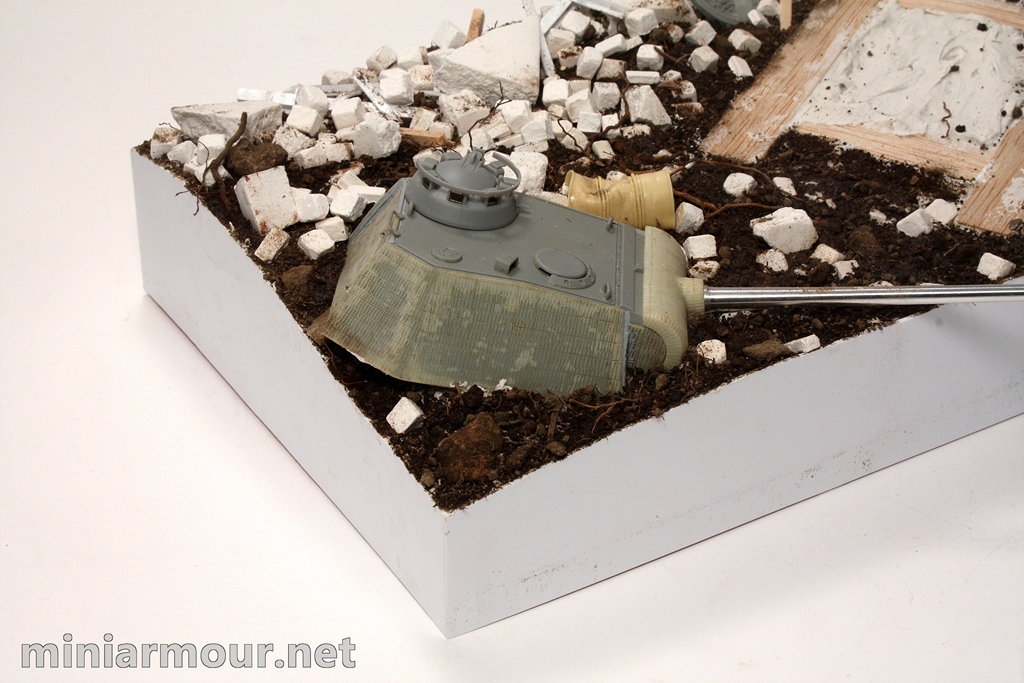
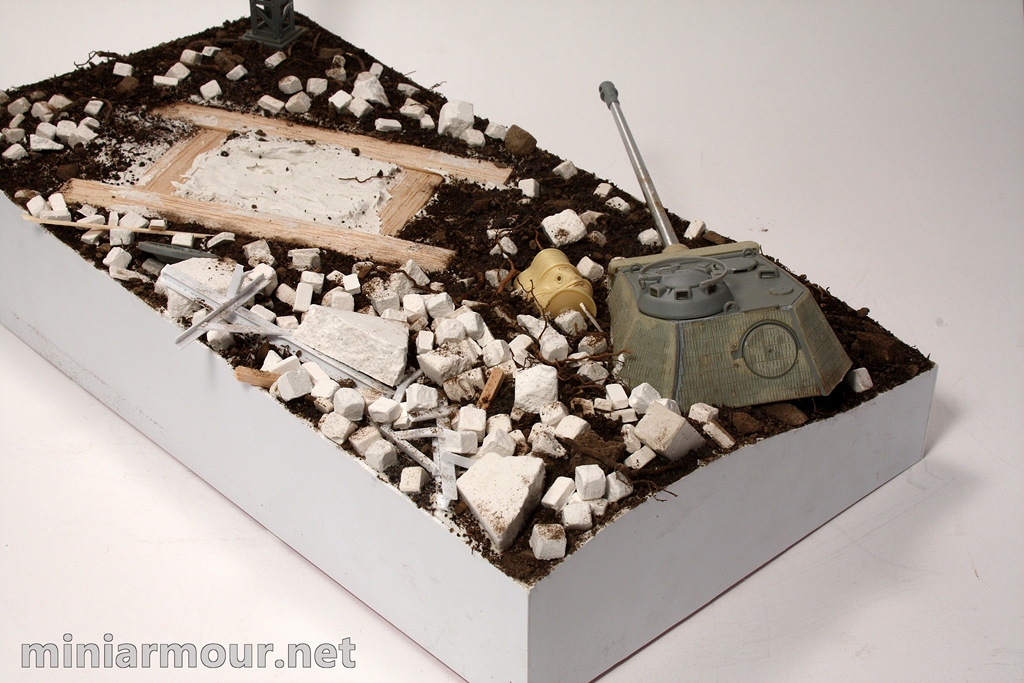
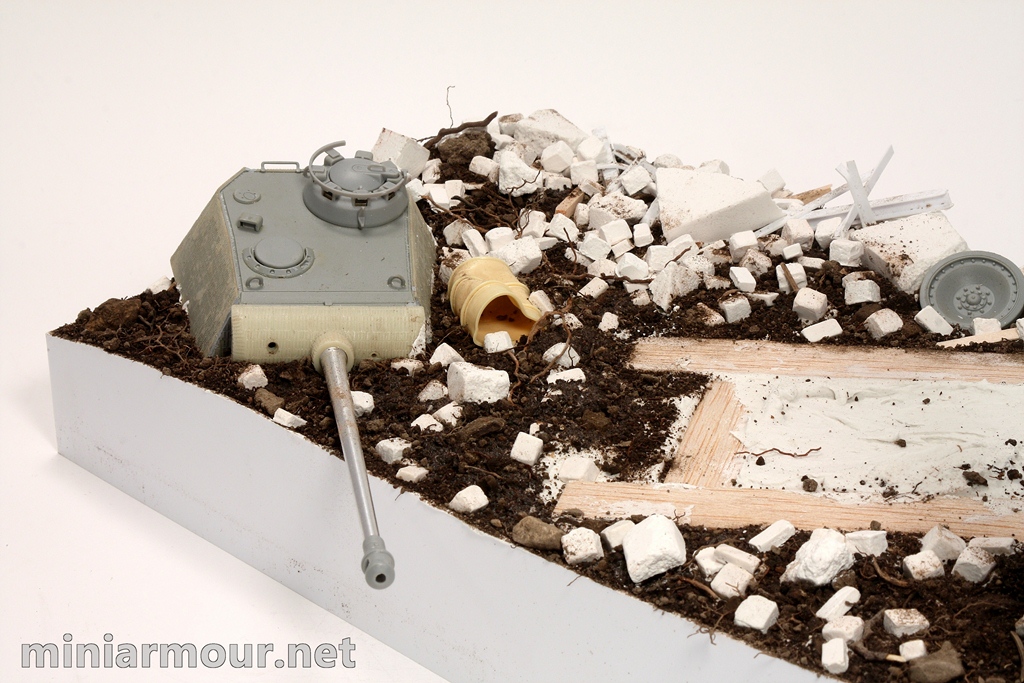
– Panther turret. This was a leftover from an unfinished project from long time ago (my skills were lagging behind my ambitions at that time, so I was left with 2 panther kits in semi-built stage) and having no other use for it, it came quite handy to add point of interest to the base.
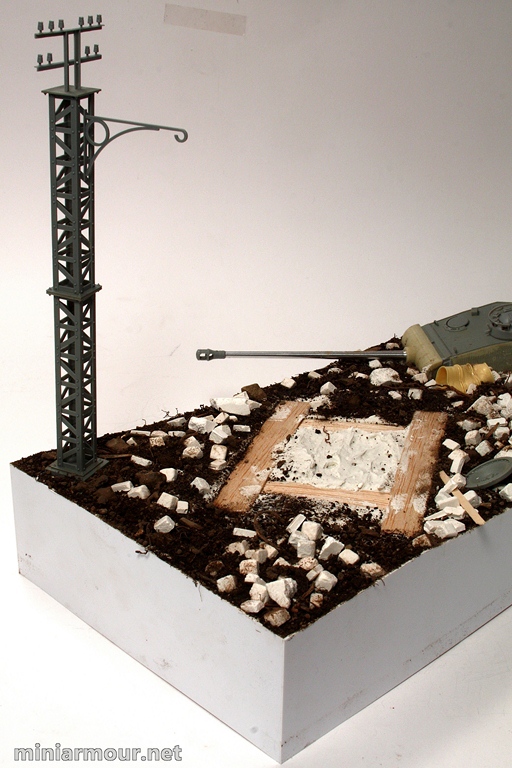
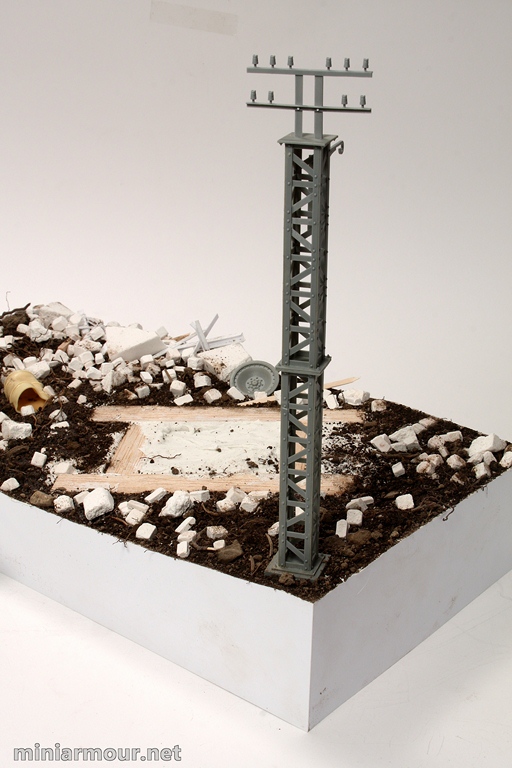
– Electric pole. This is from the Miniart set and is very well done, nice molding, good fit and it looks great. I always try to place element on the diorama that will add third dimension – height – to it. This completely changes the perception of the viewer, adds perspective of the scale and adds visual interest to the base.
– Stand for the JSU. This was made from the sheet of balsa wood and is used to make sure that the vehicles will sit on the surface with all of its wheels on the ground. Alternatively you can use workable tracks and only glue the suspension arms only after positioning the vehicle on the ground, but this assumes that you have the base ready before the vehicle is finished, which is rarely my case. This stand can be made from four rectangular sheets of balsa – two to be placed underneath the tracks. Make sure to cut them to match the width of the tracks and length of the tracks actually touching the ground and to attach them to the two cross connectors connecting them at the right distance – distance between the tracks of the vehicle. When placing them, gently push them into the surface and make sure it is not bent – test this by lacing the vehicle on it and check the wheel positioning vs. ground.
– Dried soil. This is the cheapest diorama product I use, as I collect it in my garden. I collected it about 3 years ago and still have enough of it after few diorama projects. I keep some of the soil course and some of it was crushed into very fine powder to achieve natural variety in the of the ground cover. I just sprinkle the soil over the surface and if necessary, I apply the white glue & water mixture on top of it – just use large brush and touch the surface and let the capillary action spread the mix over the surface.
– Bricks and pavement stones. These were cast in plaster using J’s work molds. Using these molds wasn’t as easy as I have expected. The molds are quite small (especially he bricks one) and I tried to pour the plaster in them, it dried too quickly for all the bubbles trapped in the molds to escape. When I have tried to use thinner plaster mixture, the result was that the plaster has not dried properly and the resulting bricks and stones have soft, chalk-like density and the surface rubs off quite easily. I have also cast one large rectangular plate of plaster and then just broke it into smaller pieces and placed them sparingly on the surface, simulating ruins of larger structures.
– Small roots and branches. Again sourced from my garden, when cleaning the flower beds during the spring or summer I collect these and store them aside for future modeling use. They are great addition to any diorama as they are essentially unsurpassed in simulating branches / bushes and roots in scale.
– Pieces of metal structures. These are intended to simulate collapsed structures such as electrical towers. They were randomly put together from the styrene profiles – using variety of them – H, I, L and adding screw heads using punch-and-die set. These were combined with the other elements in a way that looks natural.
All the elements, individual bricks and stones and roots were positioned one by one. This is bit tedious, so plan to have some time for this step – 2-3 hours, but the result is well worth it.
With all the elements placed, I let the base dry for 2-3 days. Some cracks may appear on the surface, but these will either be invisible after painting, or can be left to simulate actual cracks in the ground or can be covered by repeating the surface covering process described above.
Next step will be painting.

Categories: My models

3 replies »